Working on the new bike
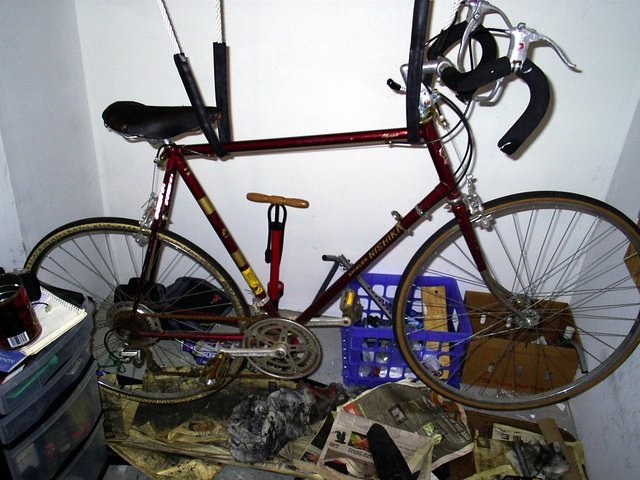
I've been working on the new bike for the past couple of days. It was pretty sad looking when I got it:
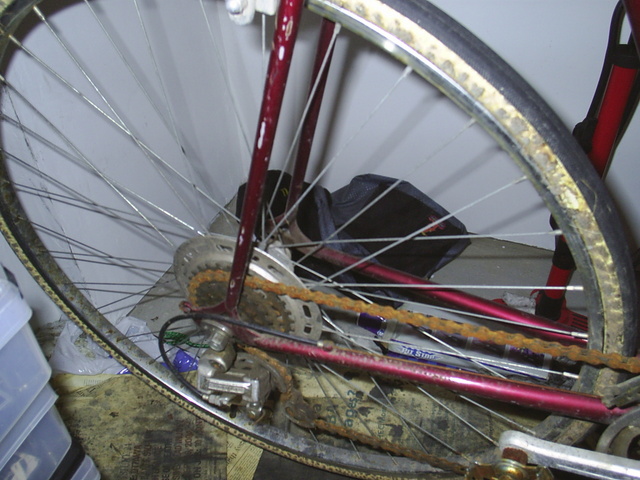
The chain looked like it was completely shot:
And the pedals weren't looking too happy at all:
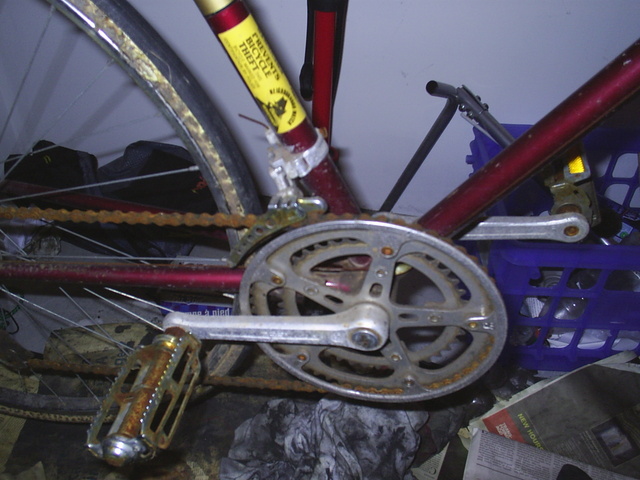
The gears were also rusted solid on the front derailleur, although the rear seemed OK. I started by cleaning off the chain with my chain cleaner, starting with hot water to get the surface dirt off, then chain cleaner, and alternating until the magnet in the chain cleaner wasn't pulling any more filings off. By that time the chain was clean and seemed pretty undamaged, so I oiled it up and left it.
Next I started on the front derailleur. I blasted WD40 at all the rusted parts to unseize them, which helped quite a bit. Once the WD40 evaporated I squirted some light oil in the derailleur and shifter, which ended up letting me shift up fine, but down was still iffy. With deduction skills that would have done Sherlock Holmes proud, I decided that the fact the cable was completely rusted was probably the reason.
I then disassembled the rear brake, since that was so rusted that not even WD40 would work. I decided the best bet would be to set up an electrolysis bath, since I was too lazy to sit and fiddle with a wire brush on all the tiny parts. I set up the test bath using some bent nails I had, some baking soda, some hookup wire, and the battery charger from my bike lights:

Needless to say, this is not the safest way to remove rust, but it does the trick. I would not recommend anyone do this unless you know exactly what you're doing; it's basically using a salt solution to [insert vague half-remembered high school level chemistry lesson on ions] by pulling the oxide out of ferrous oxide (ie rust), leaving ferrite (iron). A sample of just a few of the gases that may be given off are:
* Oxygen (er, fairly safe)
* Hydrogen (explosive)
* Carbon Monoxide and Dioxide (not good)
* Chlorine (really not good, so don't use table salt - aka Sodium Chloride)
After about 20 minutes, the dirt started lifting off:
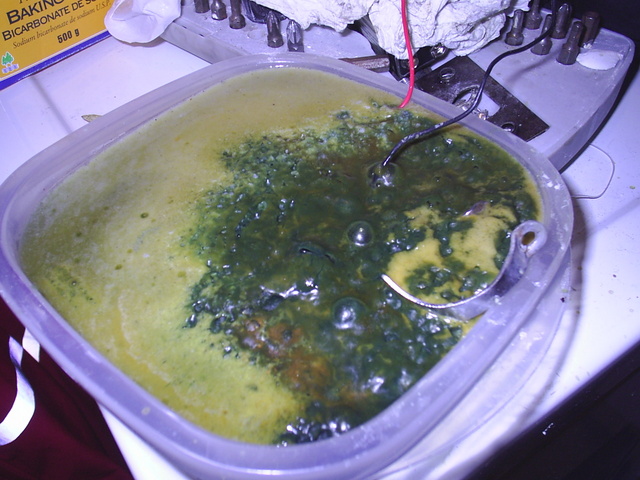
Unfortunately, the yellow goop means chromium was coming off something. Looking at the nails I used, I realised they were galvanised. Chromium is quite a nasty substance and is a known carcinogen, and should not be poured down the drain or out on the bit of waste land out the back door. Oh no, quite definitely not.
I replaced the nails with the heat sink sheet from one of the dead Sparc Classics I've accumulated; this is a sheet of metal about 20cm by 20cm, around 1/4mm thick, that folds quite easily.
I also replaced the battery charger (pumping out 9VDC @ 1000mA) with a beefier transformer I had in my parts box (12VDC @ 1600mA). I then started on the pedals, stripping them down and degreasing them. Looking at the pedal innards the bike has been hardly used; there's no marks of wear on either the bearings or the bearing races, and the only marks of use on the pedal casing are where the pedal's been used to (presumably) lean the bike against the wall. The rust was everywhere, though:
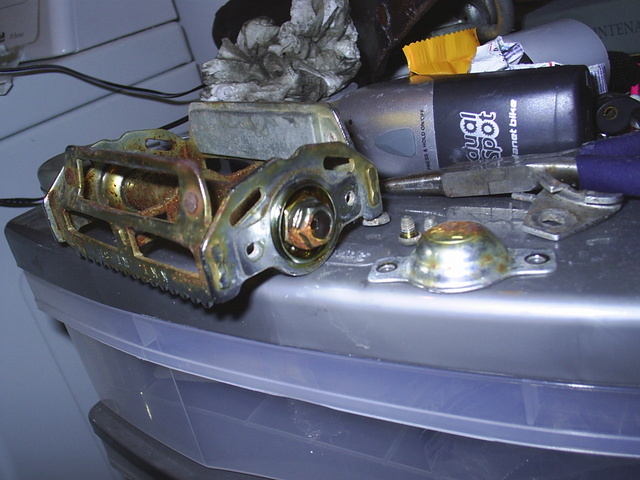
I left the electrolysis bath running for an hour or so, and then took the pedal out, washed it off, dried it and rubbed off the rust with a rag, wiped a thin film of grease all over it then reassembled. Here's the result afterwards, with the other uncleaned pedal next to it:
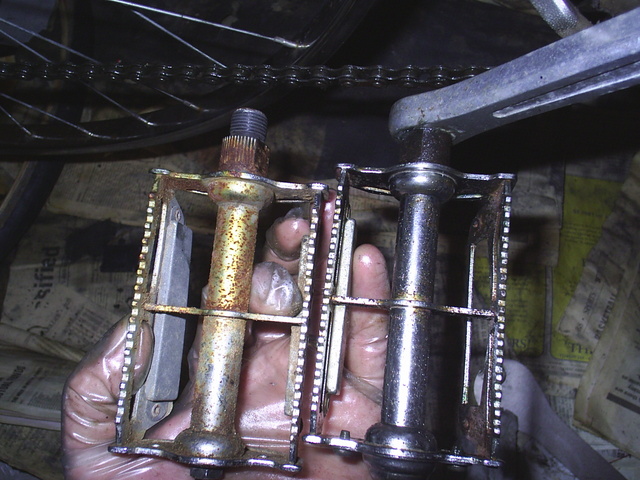
The electrolysis can't do anything about the pitting, but the surface rust is removed or loosened, and any sub-surface rust is converted back to iron. The metal is immediately vulnerable to rust (I had rust forming after about 20 minutes), so anything cleaned in this method must be rinsed off immediately (to remove the salts), cleaned off with a rag (this will lift off remaining rust) and then coated with a thin film of grease to protect it. This means this technique must not be used on steel rims with rim brakes unless you want a really interesting time braking.
The tyres are completely shot, as are the tubes. I'm going to pick up new tyres and tubes tomorrow, then I should be able to take it out for a test ride to see if it'll hold enough to ride into town, where I can take it into the bike shop to get them to finish off what needs doing - I think new cables are probably all that's required, which any luck. After that I'll have a nicely lugged steel road bike with a near-perfect frame size for next to nothing!

The chain looked like it was completely shot:

And the pedals weren't looking too happy at all:

The gears were also rusted solid on the front derailleur, although the rear seemed OK. I started by cleaning off the chain with my chain cleaner, starting with hot water to get the surface dirt off, then chain cleaner, and alternating until the magnet in the chain cleaner wasn't pulling any more filings off. By that time the chain was clean and seemed pretty undamaged, so I oiled it up and left it.
Next I started on the front derailleur. I blasted WD40 at all the rusted parts to unseize them, which helped quite a bit. Once the WD40 evaporated I squirted some light oil in the derailleur and shifter, which ended up letting me shift up fine, but down was still iffy. With deduction skills that would have done Sherlock Holmes proud, I decided that the fact the cable was completely rusted was probably the reason.
I then disassembled the rear brake, since that was so rusted that not even WD40 would work. I decided the best bet would be to set up an electrolysis bath, since I was too lazy to sit and fiddle with a wire brush on all the tiny parts. I set up the test bath using some bent nails I had, some baking soda, some hookup wire, and the battery charger from my bike lights:

Needless to say, this is not the safest way to remove rust, but it does the trick. I would not recommend anyone do this unless you know exactly what you're doing; it's basically using a salt solution to [insert vague half-remembered high school level chemistry lesson on ions] by pulling the oxide out of ferrous oxide (ie rust), leaving ferrite (iron). A sample of just a few of the gases that may be given off are:
* Oxygen (er, fairly safe)
* Hydrogen (explosive)
* Carbon Monoxide and Dioxide (not good)
* Chlorine (really not good, so don't use table salt - aka Sodium Chloride)
After about 20 minutes, the dirt started lifting off:

Unfortunately, the yellow goop means chromium was coming off something. Looking at the nails I used, I realised they were galvanised. Chromium is quite a nasty substance and is a known carcinogen, and should not be poured down the drain or out on the bit of waste land out the back door. Oh no, quite definitely not.
I replaced the nails with the heat sink sheet from one of the dead Sparc Classics I've accumulated; this is a sheet of metal about 20cm by 20cm, around 1/4mm thick, that folds quite easily.
I also replaced the battery charger (pumping out 9VDC @ 1000mA) with a beefier transformer I had in my parts box (12VDC @ 1600mA). I then started on the pedals, stripping them down and degreasing them. Looking at the pedal innards the bike has been hardly used; there's no marks of wear on either the bearings or the bearing races, and the only marks of use on the pedal casing are where the pedal's been used to (presumably) lean the bike against the wall. The rust was everywhere, though:

I left the electrolysis bath running for an hour or so, and then took the pedal out, washed it off, dried it and rubbed off the rust with a rag, wiped a thin film of grease all over it then reassembled. Here's the result afterwards, with the other uncleaned pedal next to it:

The electrolysis can't do anything about the pitting, but the surface rust is removed or loosened, and any sub-surface rust is converted back to iron. The metal is immediately vulnerable to rust (I had rust forming after about 20 minutes), so anything cleaned in this method must be rinsed off immediately (to remove the salts), cleaned off with a rag (this will lift off remaining rust) and then coated with a thin film of grease to protect it. This means this technique must not be used on steel rims with rim brakes unless you want a really interesting time braking.
The tyres are completely shot, as are the tubes. I'm going to pick up new tyres and tubes tomorrow, then I should be able to take it out for a test ride to see if it'll hold enough to ride into town, where I can take it into the bike shop to get them to finish off what needs doing - I think new cables are probably all that's required, which any luck. After that I'll have a nicely lugged steel road bike with a near-perfect frame size for next to nothing!


0 Comments:
Post a Comment
<< Home